¶ Launching the Mod Kit
The Mod Kit is launched from the Epic launcher, which you have already downloaded it from if you have followed the previous step: Installing the GROUND BRANCH Mod Kit.
Specifically, click on the appropriate icon in your library, and the editor should start launching:
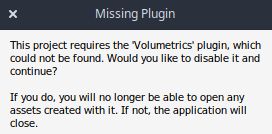
When you (first) launch the Mod Kit, you may be asked various questions. Generally you can say ‘no’ or ‘dismiss’ to these. For example:


You don’t normally have to worry about any of these options.

You can click 'yes' to disable plugins when you get errors like these.
¶ Mod Kit layout
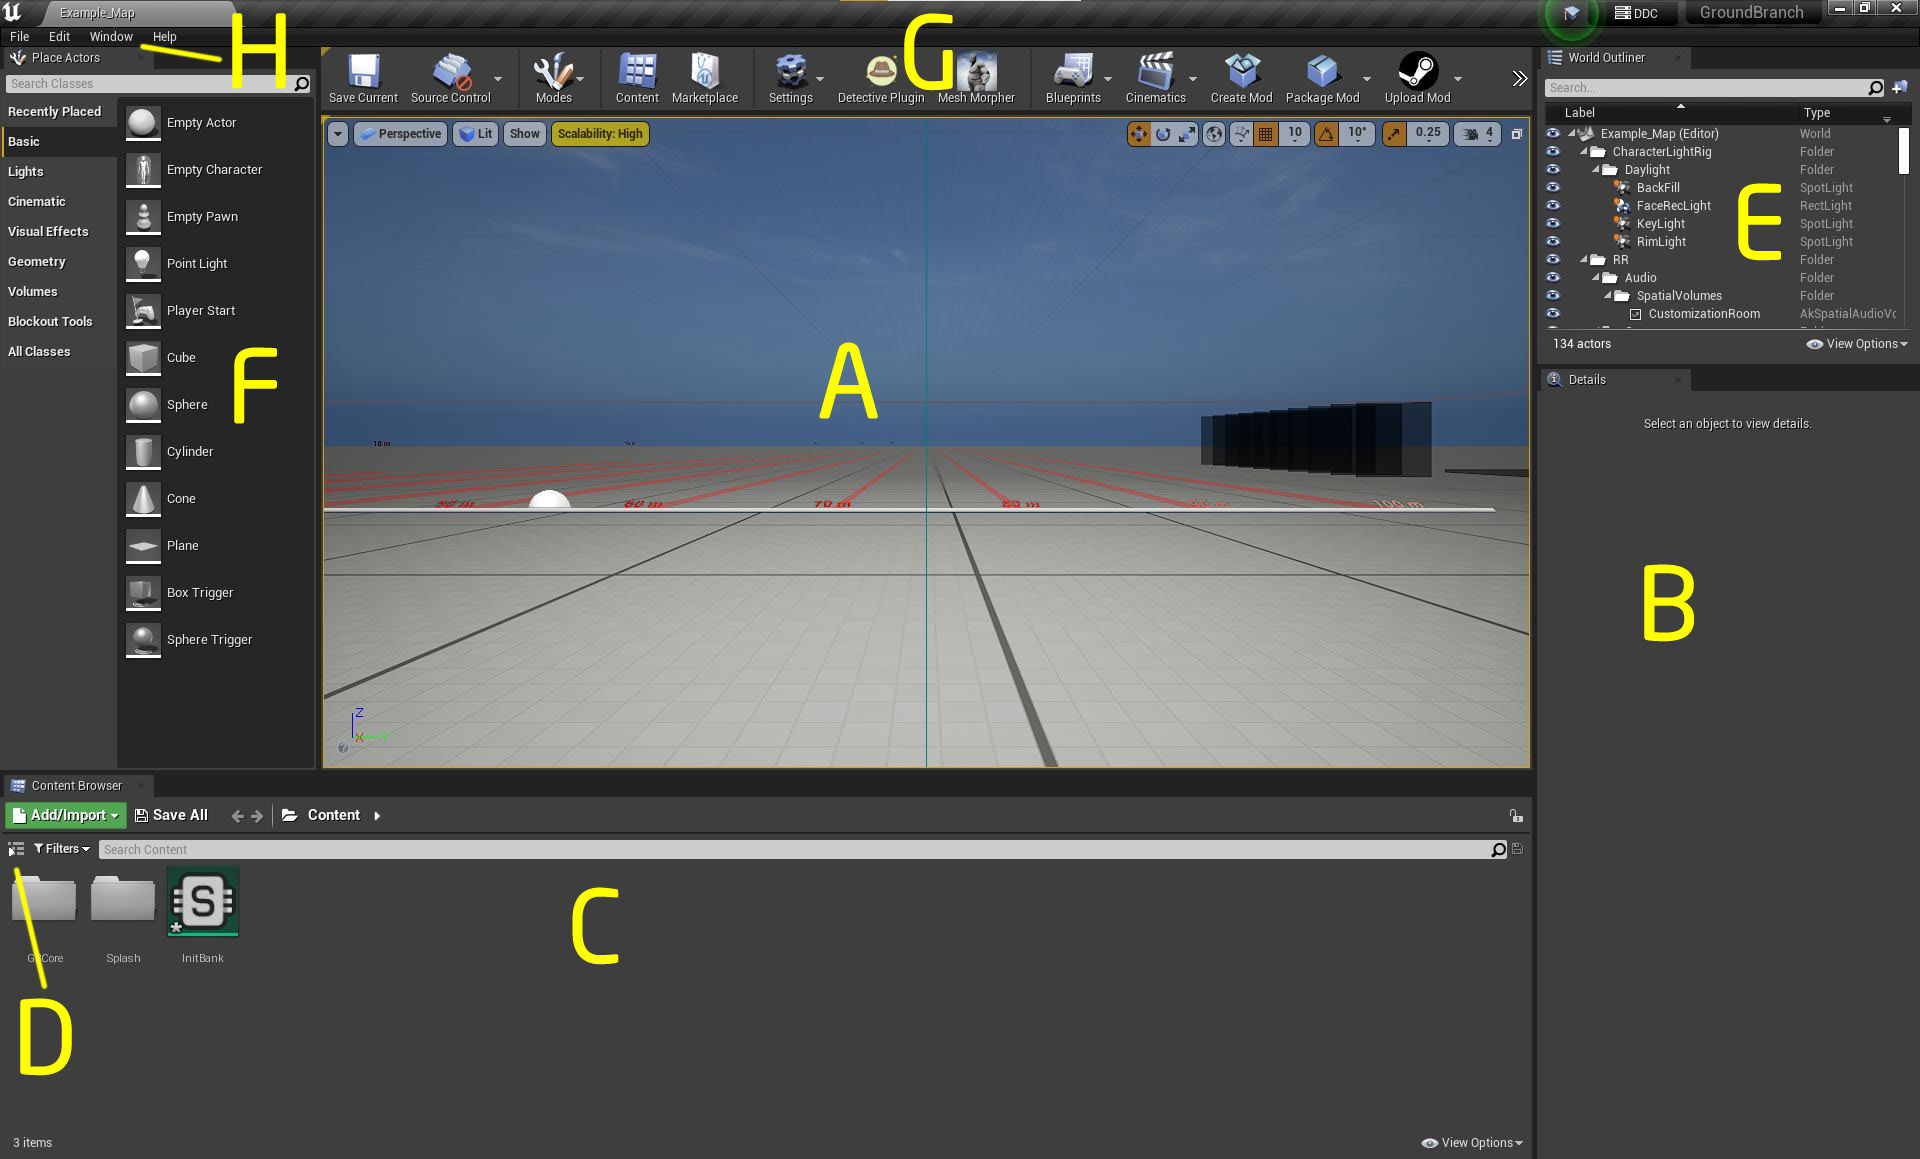
When the Mod Kit is properly loaded, you will see a screen similar to the following:

This is essentially the normal Unreal Engine 4 editor but with some extra assets and UI elements. We would refer you to the very large amount of literature and tutorials online about the Unreal Engine 4 as a background on carrying out various tasks in it. However, briefly, the main elements are:
¶ A: Main world viewport
You can freely fly around the editor world (or, in due course, your levels) in this viewport. You can left-click items in the world to select them, and you can use the right mouse button and normal movement controls (WADS) to move around the world.
¶ B: Selected item properties
When you select an item (or multiple items) in the viewport (see A above), the properties of that item or those items (where they have properties in common) will be displayed here.
¶ C: Content browser
You can navigate around your mod contents here. Please note that only Unreal Engine assets will be shown here. Non-asset files like patches, missions, game modes, and so on can only be seen in the normal Operating System browser outside the editor.
¶ D: Show directory tree button
You may find this button useful to see you mod in the context of the project as a whole. You will likely need to visit the GBCore directory at some point to find a starting point for your modded assets, and to find suitable animations, sound effects, and so on.
¶ E: World item view
All of the actors in the world are shown here, and can be filtered and selected directly from this list. Properties of selected actors are shown in element B mentioned above.
¶ F: Object browser
Certain kinds of objects can be selected directly from this area and dragged into the level to create new actors.
¶ G: Editor buttons
A number of editor functions have associated buttons displayed in this row of buttons. A number of GROUND BRANCH Mod Kit buttons are included at the end of this row.
¶ H: Editor menus
Various operations can be carried out and windows opened via these normal text menus. You can load and save levels via the File menu, for example.
¶ GROUND BRANCH modding buttons
At the right hand of the button bar, you will find some buttons specific to GROUND BRANCH modding. These are not present in the ‘vanilla’ Unreal Engine 4 editor.

¶ Create Mod
The Create Mod button will initialise a plugin directory (locally) and create a blank Workshop item (remotely), after which you can create, import and tweak your mod contents. See Creating mods for more details.
¶ Package Mod
The Package Mod button will ‘cook’ all the files in your mod and combine them in a package (.pak file) ready for uploading. It is a necessary step before uploading, but it will also check all your files and give you a comprehensive run-down of any errors detected when compiling/packaging.
See Updating mods for more details.
¶ Upload Mod
This Upload Mod button will physically transfer your packaged mod to the Steam Workshop. Congratulations! Your mod is now online. But don’t forget to test it and then set the visibility to Public.
See Uploading mods for more details.