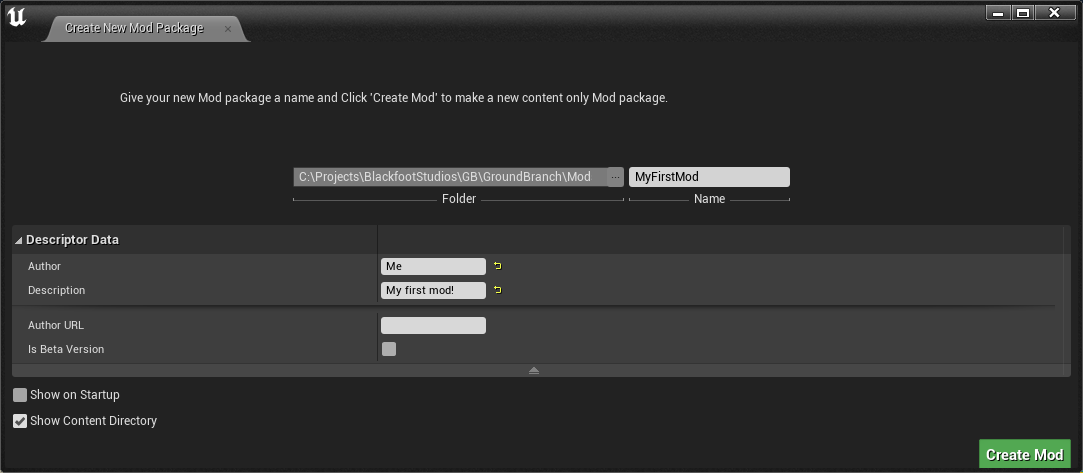
Once the editor has launched you should see the ‘Create Mod’ button on the toolbar at the top of the screen (if you have a very small screen you may need to use the double chevrons to expand the toolbar)

Next, fill out your details for mod name. You cannot use and spaces or wildcard characters.
Author and Description should just be in normal text.

You should get a notification if the mod succeeded or not

If it was successfully created you should see it in your content view as it’s own plugin

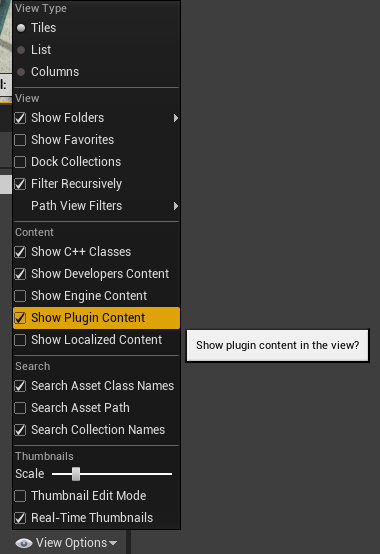
If it says it was created but you can’t see it, it is possible that plugins aren’t visible in your content view (they may be hidden by default). Click on the View Options menu at the bottom right of the content browser, and select Show Plugin Content, as shown:

If Steam was initialized properly and you have the correct authority it should have created a workshop item and you should have seen this notification. If not check the log in ‘Output Log’ for more information.

If, for any reason, the Workshop Item was not created successfully, it can be created later when you go to upload the mod (you may need to click the Upload Mod button twice to do so). This means if Steam is down, you can still get on with making your mod.
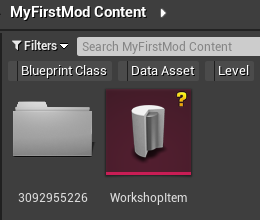
If the Workshop Item was created successfully, your content folder should look like this:

All your content should go in the workshop ID folder to avoid conflicts with mods of the same plugin name.
That’s it for creating a mod. Check out content types for how to make specific types of mod content and then once you’re ready, you can move on to packaging a mod.