¶ Carrying out the mod upload
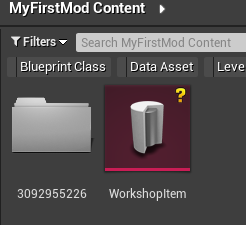
First we need to prepare the WorkshopItem data file. You will not have one before a Workshop Item has been created in your Steam Workshop. Pressing Upload Mod will generate one, and it will then move all your content into the workshop folder and repackage the mod.

Open the WorkshopItem file in the root of your mod’s content folder and fill out the details:

When you uploading your mod to the Steam Workshop, it is hidden by default (for new mods), so you can still test it and you don’t have to worry about it being public.

Assuming you’re logged into Steam with an account that owns GROUND BRANCH and have steam running. You’ll get information of what stage and sometimes a percent of the progress of your mod upload.

Your mod is now uploaded, you can now subscribe and once downloaded should be able to see it in game!
¶ Trouble-shooting mod uploads
There’s a few things that can go wrong when uploading a mod. Here are some issues that have come up while uploading mods, and some possible solutions:
I set my thumbnail path to (…)/MyMod/Content/Resources/Thumbnail_MyMod.uasset but the thumbnail is broken
→ You need to provide a link to a normal image file, not an asset (a .uasset Unreal Engine file that is created when importing an image into the Mod Kit). e.g. (…)/Thumbnail_MyMod.jpg. Ordinary image files are not visible within the Mod Kit. Use the default operating system file explorer to set up the thumbnail image file.
I try uploading my mod but it fails immediately with Error code 9
→ Make sure that your WorkshopItem data is properly set, including Mod ID